
Play by Play - Star Wars: Rebellion Strikes Back
By Brian • 11 June 2025
- Year
- 1998
- Platform
- PC
- Notes
- I've now played Rebellion more than all but five games in my Steam library. Not sure how I feel about that.
I already had another post in the works and a loose idea for another post after that, but then, to my surprise and delight, I beat Star Wars: Rebellion much sooner than anticipated and racked up three pages of notes on everything that happened between now and my last post, so I figured I’d better get it out into the wild while it was all still fresh in my mind. As such, this entry is more raw than most, but that’s okay. That’s the way it should be. I spend way too much time fiddling with posts instead of just posting. It just needs to be fun, not perfect, which it won’t be anyway, so let’s keep it simple.
Anyway, let’s talk about Star Wars: Rebellion one more time, so I can regale you with my tale of how I buried the Empire and how it will never return in any form in future films, comics, or novels.
First, I should let you know the Empire did, in fact, strike back. They obliterated my remaining defenses on Yavin IV with an unnecessarily large force, then left without a trace. I scrambled some reinforcements to defend my remaining assets on the moon, but since I had no other presence in the sector, they arrived about 40 days too late. Sorry, friends. If nothing else, with the reinforcements, I also started my efforts to take control of the whole sector for resource-gathering purposes.
Once I had the Sluis and Dufilvan sectors operating smoothly, which you can read about in my last post, my next move was something of a gamble. I decided to try to take the Sesswenna sector, home of the Imperial capital, Coruscant. Even if I couldn’t take Coruscant, itself, I felt it would still be advantageous to control every other system in the sector to eliminate any direct support from its neighbors. I did this...eventually. About half of the planets I was able to sway via diplomacy, but while I was doing that, the Empire coerced the remaining planets to join them, so these had to be taken by force, then diplomacy, always a time-consuming process. Coruscant remained firmly in Imperial hands, however, heavily fortified and with a Sith master on hand to instantly detect any covert operation I sent the planet’s way. Demoralizing, but it was the best I could do at the time.

In the meantime, I used smaller fleets to continue taking as much of the outer rim as possible, on the far side of the galaxy from the Empire’s influence. My process here was to drop a few Mon Calamari and Sullustan regiments (the best types of troops for defense and ferreting out subterfuge) on a planet, build whatever facilities and fighter defenses were needed, send replacement troops to the fleet, and move on to the next planet and repeat the process. My paranoia probably got the better of me--I’m sure I deployed too many defenses at each planet, which spread me thin and prevented me from assembling the offense I needed to successfully take Coruscant. In each sector, I tried to devote one system each to construction, troop training, and ship-building, while the rest focused on mining and refining resources. This worked fairly well—maybe not the most versatile planning, but I was able to build and distribute troops and ships quickly enough that it rarely became an issue.
While I was busy trying to surround Coruscant in the Sesswenna sector, the Empire seized the entirety of the Corellian sector. I assembled a fleet and sent it in from the Dufilvan sector, near headquarters, and slowly but surely took over the entire sector planet by planet via blockade, then planetary assault, then sending in Jan Dodonna and Borsk Fey’lya (that shrewd Bothan diplomat from the Expanded Universe novels) to convince them the Empire is no good. This probably took like five or six in-game years on its own. It was a VERY involved, tedious, and frustrating operation, but I feel it was the beginning of the end for the Empire, as they lost a ton of their resource capacity in the form of all the mines and refineries I commandeered throughout the sector. Also, aside from Coruscant, this also drove them completely out of the core sectors, forcing them to take refuge in three sectors in the outer rim I’d left largely unexplored.
Finally, I caught the Empire off-guard at the capital. I sent an espionage mission to Coruscant at just the right time, and while my spies didn’t return, they stayed alive long enough to learn the massive defense fleet orbiting the world had left, and all that remained were several TIE Defender squadrons. I moved the big fleet operating in the sector into orbit, eliminated the fighter screen, and blockaded the planet.
Unfortunately, that was all I could do. In spite of its weakened state, Coruscant still boasted too many shields for planetary assault, and too much leadership present on the planet’s surface to run successful sabotage missions on their troops or facilities. I had to be content to maintain the blockade.
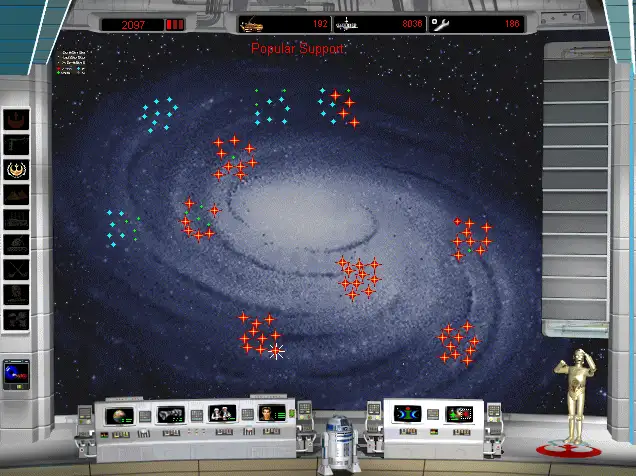
Even though I felt I was on the cusp of victory, things got really frustrating at this point in the game. As the blockade of Coruscant continued, the Empire sent roving death fleets throughout the rest of the sector, repeatedly wiping out my fighter screens and bombarding each planet one by one. I finally wisened up and installed shield generators everywhere, but it took me longer than I’d care to admit to realize I didn’t already have them on each system. I lost a lot of support, so much so that Uvena and Balmorra declared neutrality, and I had to scramble Leia, Vanden Willard, and my other diplomats into damage control to regain the trust of the rest of the planets in the sector before I lost any more of them. In time, I convinced Balmorra to rejoin the Alliance, but Uvena fell under Imperial influence once again.
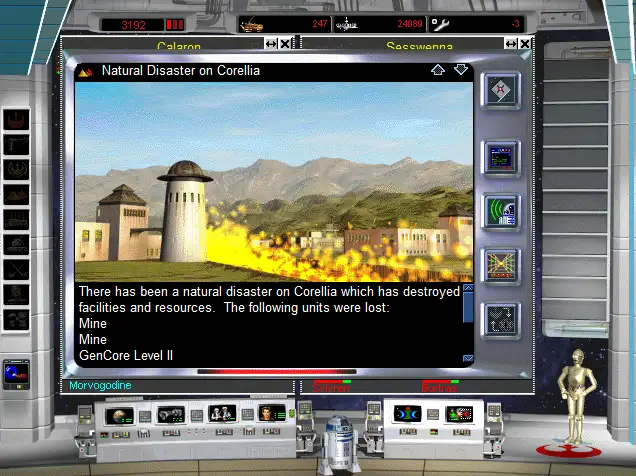
Since I couldn’t successfully take control of Coruscant, my plan was to take control of the rest of the Outer Rim, the Empire’s only other remaining safe haven, and ultimately starve them out of resources. However, I had to pivot because I ran into another problem: natural disasters. These occur randomly on planets, destroying facilities and reducing the maximum number of facilities that can be built on that planet. These things started happening ALL THE TIME. Like, one every 100 days or less. I kept having to scrap large swaths of my military because, as I lost tons of mines and refineries to disasters, I no longer had the resources necessary for upkeep. I don’t know if this was a bug or part of Rebellion’s balancing, as the number of disasters seemed to increase exponentially as I accrued more and more territory.
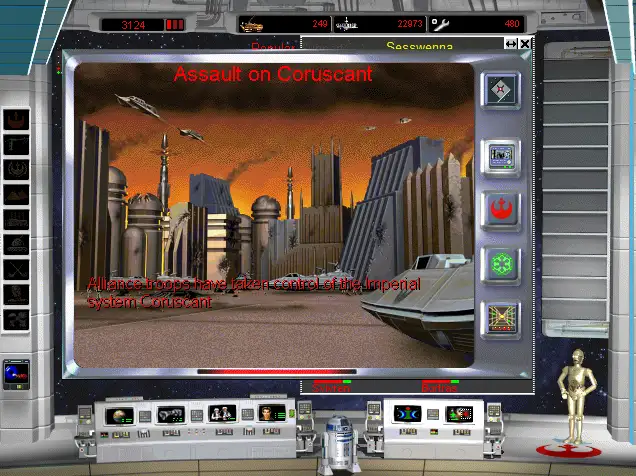
I started to worry whether or not I’d be able to maintain a long-game with all the resources I was losing, so I made an uncharacteristically aggressive move. I pulled my fleet from the Corellian Sector and my fleet from the Orus Sector and sent them to Coruscant to join the blockade, along with my all-star task force of Luke Skywalker, Han Solo, and Chewbacca. Between the combined troops of all three fleets, I had enough manpower to capture Coruscant. The Emperor escaped, however. General Dodonna quickly swayed the populace to our side. That just left Uvena. Once I took Uvena, I would have complete control of the galaxy save three Outer Rim sectors, and planned to run fleets through the Empire’s remaining territory until they flushed out Vader and Palpatine.
But, I didn’t have to do that! I blockaded Uvena, then sent in Luke, Han, and Chewie to sabotage the ground forces. When I did that, Luke discovered Vader and the Emperor were on Uvena. He automatically engaged them in The Final Battle and brought in both villains like the complete badass we all know Luke to be.
With Vader and the Emperor in captivity and Coruscant under firm Alliance control, the game ended. Those last dominoes fell so quickly that I couldn’t process what was going on. All of a sudden Threepio was shouting that we had Vader and Palpatine and that the Empire was defeated and the end cinematic rolled. Huh? We did? They are?! Having saved just before my move on Uvena, I loaded the game to make sure I hadn’t encountered a bug or something. But no, we pulled it off! That’s Star Wars: Rebellion! A little anticlimactic and disorienting with that sudden ending, but hey, I’ll take it.
Other Rebellion Highlights
- A lesson I wish I’d learned earlier in the game was to use Luke, Han, and Chewie for sabotage and capture missions ALL THE TIME. Like, as much as possible. Luke was hard to manage because he had a lot to do. I mostly used him for recruiting at first, which maybe wasn’t the best use of his abilities since he’s so good at combat. Then he left for Jedi training with Yoda for a while. Upon his return, I moved him into more combat and sabotage roles. This was important because, as I took over more and more territory, most remaining Imperial systems had leaders stationed at them, greatly reducing the success rate of subterfuge. On top of that, if the Emperor is on Coruscant, he gives leaders an extra leadership bonus, making them even more formidable. As such, my regular nameless infiltrators typically failed their sabotage missions. So, I started sending in Luke, Han, and Chewie, instead, and they usually got the job done. I should have been doing this all long, but was so worried about getting them captured that I played conservatively, instead. Characters gain skill as they conduct missions, as well, so they only get better at the things you assign them to do.
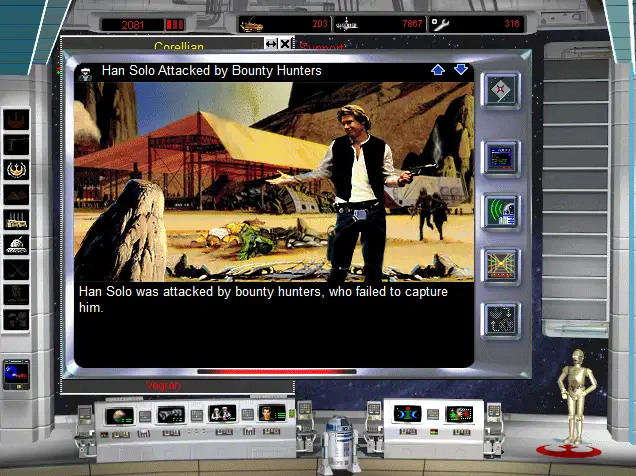
- Han was attacked by bounty hunters on multiple occasions, but they never managed to capture him.
- One time, I sent Luke, Han, and Chewie on a mission to capture General Veers, and they killed him. Whoops. That wasn’t part of the plan—the Alliance can’t run assassination missions like the Empire can. I guess something went wrong during the capture and Veers got himself killed. It was weird, and the only time that happened in the game.
- I also lost a couple of characters along the way. Tura Raftican, a pretty obscure character who originates from the Star Wars RPG, was killed on an espionage mission. I also lost Orrimaarko, another obscure character, because it turns out he was Force-sensitive (as discovered by Luke earlier in the game), but ended up on a mission on the same planet as Darth Vader, whom I didn’t know was there. Vader sensed his presence and easily intercepted and killed him.
- In hindsight, I wish I had moved on Coruscant sooner. Just brought all the fleets together and dropped the hammer rather than getting stuck in “elimination mode” and feeling like I needed to completely wipe the Empire off the map to really win. The resource and garrison management got to be too much, and the natural disasters caused a lot of late-game trouble. I just had it in my head that the Emperor and Vader would go into hiding somewhere in the Outer Rim once Coruscant fell, so I was compelled to try to take over everything to prevent that.
- I’m a starship nerd, so naturally, I like the variety of ships in Rebellion and assembling good, versatile fleets. I’m pretty sure some of these ships were invented for this game, like the Liberator Cruiser and the Bulwark Battlecruiser, for balance purposes, to give the Alliance ships that were equivalent to some of the Empire’s larger ships, like the Imperial-2 class Star Destroyer or the Super Star Destroyer.
- Speaking of Super Star Destroyers, one of the Empire’s roving death fleets briefly included one. During an attack on one of my systems, my B-wing defenses managed to damage it. I never saw it again after that—my hope is that the Empire was short enough on resources at that point that they had to decommission the Super Star Destroyer and use its resource points for other purposes.
- Definitely more aggression and less defense next time. It took me over 3000 in-game days to win. That seems like way too long.
- I never got an Incite Uprising mission to work. I’m not sure what I should have done differently to have success. It turns out I didn’t need them, but now I’m just really curious!
- When I took control of Coruscant, I lost some popular support in all of my controlled systems in the sector. Huh? How does that work? My head-canon determined that pockets of Imperial sympathizers must have swollen and incited uprisings among the population when Coruscant fell. It’s the only way it makes sense.
- Total play time: 32.7 Hours
Final Thoughts
I feel redeemed! I don’t think I played well, and despite the frustrations and challenges along the way, I had a lot of fun with Star Wars: Rebellion. Actually playing it correctly made it much more interesting than it was when I was a teenager. I might be willing to play it again, but probably in more of a Sim City or Stardew Valley capacity, like 15 to 30 minutes a day over the course of a few months. I found that the longer my play sessions, the more frustrated I generally got, so short bursts might be the way to go with this one. There are a lot of details to keep up with, so much so that it’s easy to get lulled into inactivity. I tried to keep things moving at all times—sending diplomats to neutral worlds, building new troops and ships at all times to shore up defenses or attack fleets, sending scouting parties to the Outer Rim, and so on, all the while second-guessing each decision and playing in perpetual dread of an Imperial fleet showing up anywhere, any time, and reducing a planet to rubble. It was fun. I swear.
On that note, I have another Star Wars 4x strategy game that I’ve never played called Empire at War. I guess I ought to check that one out sometime, too, huh? Not right now, though. Later. Definitely later.
Thanks for reading, and see you next mission!
Boxart Credit: MobyGames